Nothing you gather in a wood is waterproof. Natural roofing works by making water travel downward and outward across overlapping layers rather than by resisting it, which means technique matters far more than material.
What are the two principles that matter?
Angle and overlap. A steep roof gives water little time to dwell and soak inward, so pitch at forty five degrees or more wherever possible. Overlap means every layer covers the top portion of the layer below, so water running off one piece lands on another rather than finding a path through. Roof tiles, slates and thatch all work this way, and a debris hut or lean to is simply a crude version of the same idea.
Which direction should you work?
From the bottom upward, always. Start at the lowest edge of the roof and lay your first course, then lay the next course above it overlapping by at least half. Working downward from the ridge produces a roof where every join faces uphill and funnels water inward, which is the single most common thatching mistake and it turns a roof into a collection system. If it is already built the wrong way, adding a fresh set of courses from the bottom up over the top will usually rescue it.
- Pitch at forty five degrees or steeper
- Work from the bottom edge upward, never top down
- Overlap each course by at least half its length
- Lay leaves and boughs with tips pointing downhill
- Aim for sixty centimetres or more of settled depth
- Cap the ridge with an extra layer, since it leaks first
Which materials shed water best?
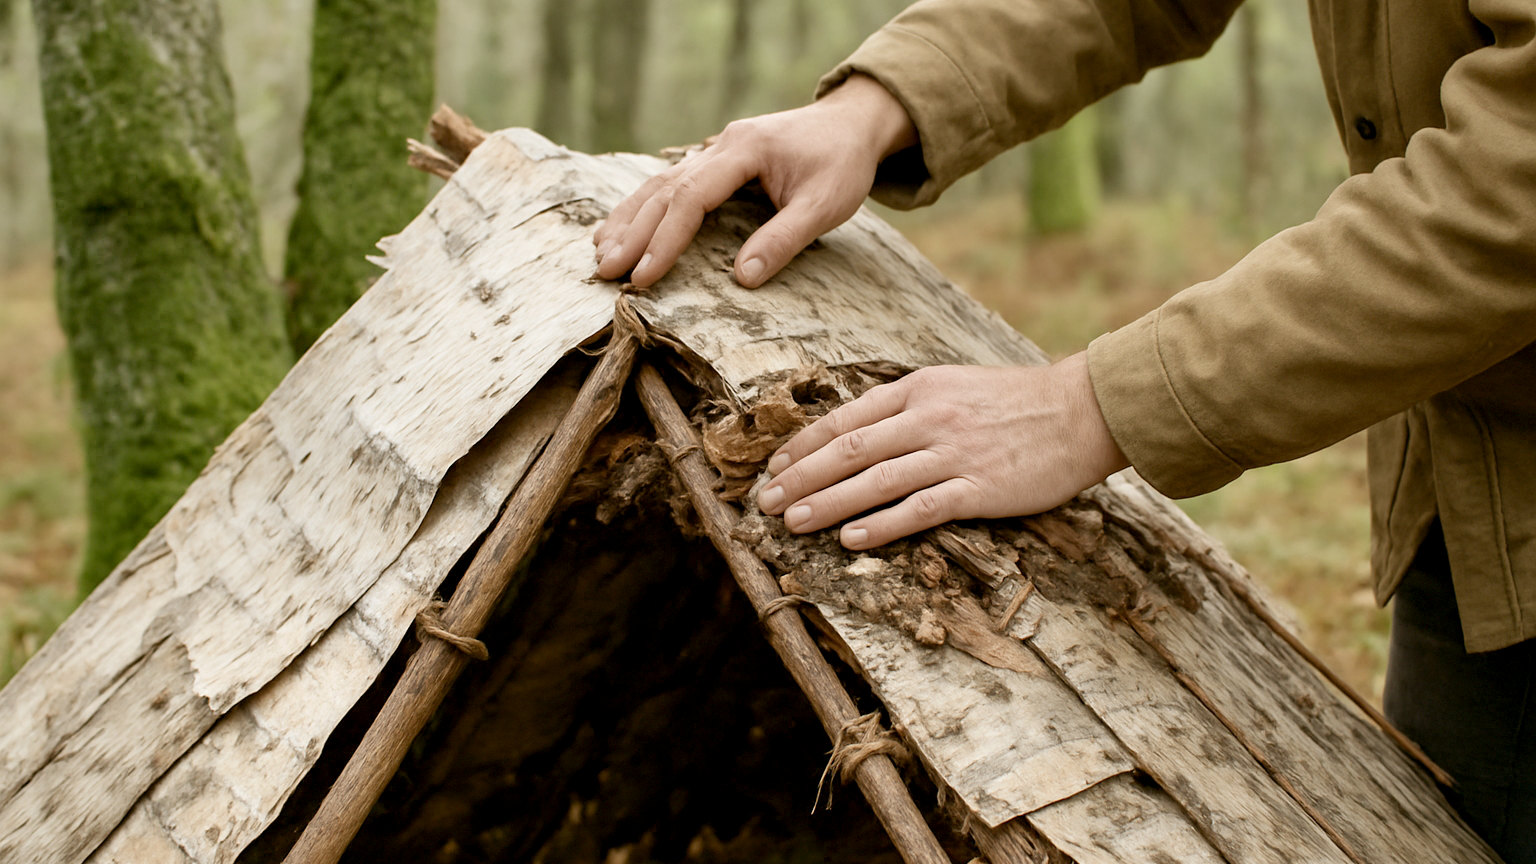
Bark is the closest thing to a waterproof sheet available, and slabs taken from a fallen or dead tree can be laid as large shingles with excellent results. Conifer boughs work well laid in overlapping courses with the curve upward and tips down. Bracken is abundant and effective. Broad leaves, reeds, long grass and moss all serve, with moss usefully filling gaps between coarser material. Living bark should be left alone, since stripping it around a trunk kills the tree.
How thick does natural thatch need to be?
Around sixty centimetres of settled material for a debris hut, less for a well angled bark or bough roof where individual pieces do more of the work. The daylight test is the practical measure: lie inside and look up, and any light coming through is a route water will find. Expect to add material after the first rain, because leaks reveal themselves rather than being predictable.
How do you find and fix a leak?
From inside, during rain, which is unglamorous but far quicker than guessing. Note where water enters and mark it with a stick pushed through, then go outside and add material above that point rather than at it, since water travels along the underside of the structure before dripping. Most leaks trace back to insufficient overlap, a shallow section of roof, or a gap where the roof meets the ridge or the ground.
What about the ridge and the base?
Both are weak points. The ridge is where two slopes meet and where water concentrates, so add a generous extra capping layer laid across the join. At the base, make sure the thatch extends well past the shelter walls so runoff lands clear rather than soaking into the ground you are lying on. A shallow drainage channel scraped around the uphill side diverts surface water before it reaches your bedding, which takes five minutes and prevents a soaked night.
Can you use a waterproof layer underneath?
Yes, and it transforms the result. A survival bag, bin liners split open, a groundsheet or even a large sheet of bark laid over the frame before thatching gives a genuinely impermeable layer, with the debris above it providing insulation and holding it in place. This is far more effective than either element alone, since the plastic stops water and the debris stops wind and heat loss. It is the standard approach when you have any sheet material at all, and it cuts the required depth of thatch considerably.
Steep, overlapping, bottom upward and deeper than you think. Those four points do the whole job without a scrap of waterproof material.